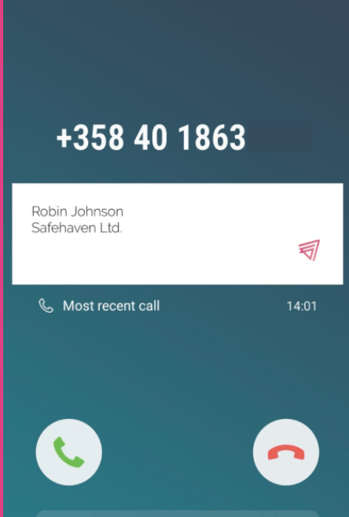
To start using the Caller ID feature, please make sure you've enabled Salesforce or Hubspot integration or any other integration.
1. On iOS:
If you would like to use the Caller ID feature that Salestrail provides to you out-of-the-box, you need to make a minor change to Settings in your iPhone. This is because the Caller ID is partly provided by Apple and works in combination with Salestrail.
Step 1: Open Settings from your iPhone
Step 2: Scroll and navigate to Phone
Step 3: Choose Call Blocking & Identification
Step 4: Check that the Check Box next to Salestrail is enabled
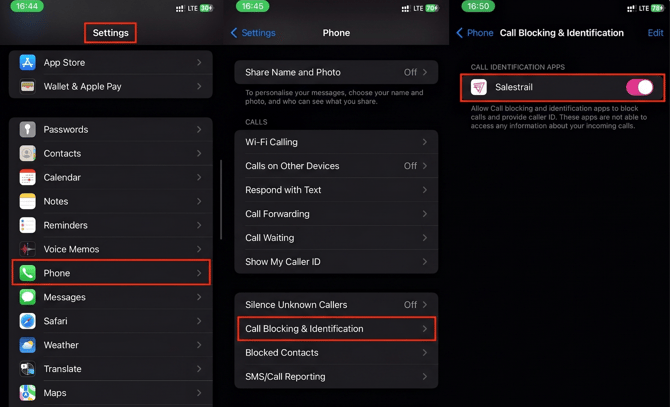
Step 5: Restart Salestrail to apply the changes.
Note #1:
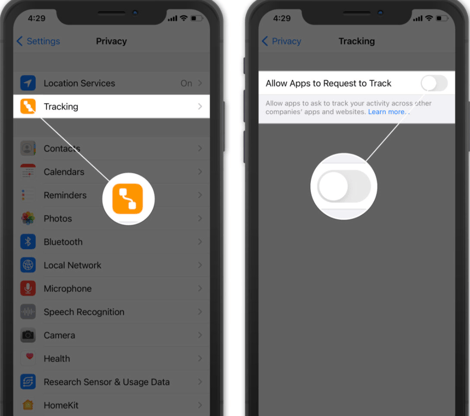
If you couldn't find Call Blocking & Identification from the Phone setting, please enable app tracking as follows:
-
From the phone Settings, navigate to Privacy
Check the box Allow Apps to Request to Track
Note #2:
The Caller ID will be displayed in two different places on your iPhone:
-
When you receive a call, the Caller ID is shown below the phone number
-
When you browse Call History, the Caller ID is shown on each call that was identified.
2. On Android:
You can enable Caller ID simply as follows:
Step 1: Open Settings from your Phone
Step 2: Scroll and navigate to Apps
Step 3: Choose Salestrail > navigate to Appear on top
Step 4: Switch it on to allow Salestrail permission.

Step 5: Lastly, check the Caller ID box in the Salestrail app Settings.
And voila! You're all set!